Play Date DIY Party Favors
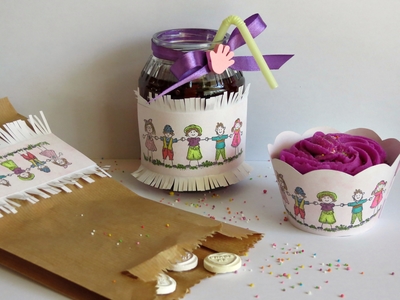
Spring is just around the corner, which means it's a great time to have a celebration! With these Play Date DIY Party Favors, you can easily make any get-together extra special. Whether you need party crafts to make for your child's birthday or you simply want to make a play date memorable, these party favor ideas are a simple way to add that little something extra to your gathering. With this tutorial, you will learn how to make your own party favors, and you'll also learn how to dress up juice glasses and package cupcakes. Your children and their friends will just love these!
Materials:
- Pattern for cupcake wrapping
- Glass (or plastic) jars
- 4.2” x 8.4” brown paper bag
- A4 sheet of light pink marbled cardstock
- A4 sheet of white shimmer cardstock
- 0.3” wide purple satin ribbon
- 0.4” sized pink wooden hand
- Micia rubber stamp with children holding hands, or similar
- Micia Old Hand black dye ink pad, or similar
- Colored felt-tip pens
- Quick-drying craft glue (such as Bostik Clear)
- Standard scissors
- Pencil
- Utility knife
- Cupcakes, sweets, juice and drinking straws
Instructions:
For the Cupcake Wrapping:
1. Trace the pattern for the cupcake wrapper onto the pink marbled cardstock and cut it out.
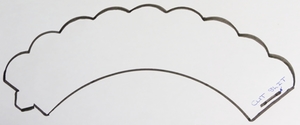
2. Use the utility knife to cut a slit into the wrapper, as indicated on the pattern.
3. Cover the stamp with the black ink and transfer it onto the left side of the wrapper. Carefully lift the stamp and repeat on the right side of the wrapper. Allow to dry thoroughly.
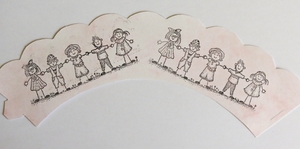
4. Use the colored felt-tip pens to color the children’s clothes and hair, as well as the grass below their feet.
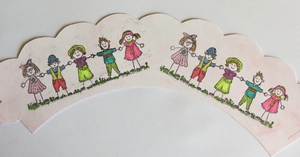
5. Wrap the wrapper around the cupcake.
For the Party Glasses:
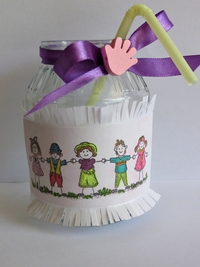
1. Wash the jar thoroughly and allow to dry overnight.
2. Cut a strip sized 3.4” x 2.4“ from the white shimmer cardstock.
3. Cut a strip sized 3.4” x 1.5” from the pink marbled cardstock.
4. Stamp the image onto the middle of the pink cardstock and allow to dry thoroughly.
5. Glue the pink marbled cardstock strip on top of the white cardstock.
6. Cut fringes into the white cardstock.
7. Use the colored felt-tip pens to color the children’s clothes and hair, as well as the grass below their feet.
8. Glue the strip around the jar, but do not glue down the fringes.
9. Bend the fringes slightly, so that they will curl upwards.
10. Add the purple ribbon around the neck of the jar and make a bow. Neatly cut off the ends of the ribbon.
11. Glue the wooden hand on top of the bow’s knot.
12. Add the juice and a straw.
For the Party Favor Bags:
1. Cut a strip sized 5.4” x 2.6“ from the white shimmer cardstock.
2. Cut a strip sized 5.4” x 1.5” from the pink marbled cardstock.
3. Stamp the image onto the middle of the pink cardstock and allow to dry thoroughly.
4. Glue the pink marbled cardstock strip on top of the white cardstock.
5. Cut fringes into the white cardstock. Leave a space at the bottom where you can write the child’s name.
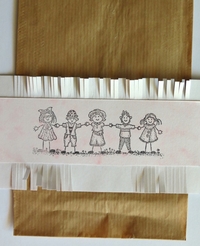
6. Glue the strip to the front of the bag, but do not glue down the fringes. Cut off any protruding edges on the sides of the bag.
7. Use the colored felt-tip pens to color the children’s clothes and hair, as well as the grass below their feet.
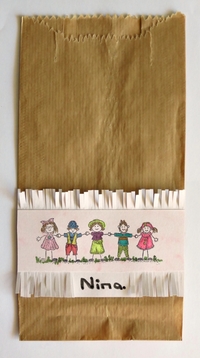
8. Bend the fringes slightly, so that they will curl upwards.
9. Fill the bag with the sweets.
Read NextDurable DIY Cutting Board
Your Recently Viewed Projects
flowergirl
Nov 15, 2018
This is quite the detailed tutorial. If you kids' birthday parties coming up this fall or winter, here's an opportunity to bring in the holiday theme into this craft. All the materials are easy to find and your kids can help you stamp the images.
Report Inappropriate Comment
Are you sure you would like to report this comment? It will be flagged for our moderators to take action.
Thank you for taking the time to improve the content on our site.


