Mini Tin Basket Wedding Favor
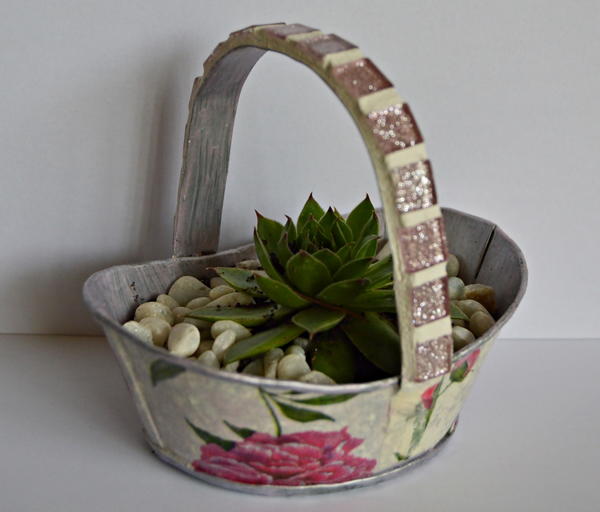
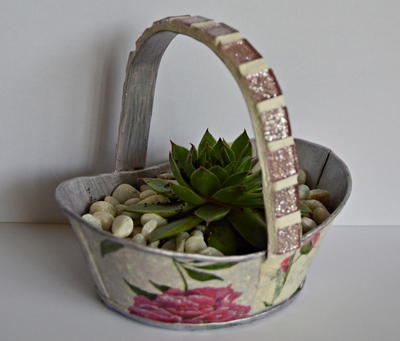
The idea of giving wedding favors is a tradition that has been around for centuries, and making spring crafts to hand out yourself is the perfect way to save money. Wedding favors originated from the belief that the couple had to share their lucky day with those attending, so why not share your own love with this Mini Tin Basket Wedding Favor? These spring craft ideas are wedding favors that will keep on giving, even long after the last bit of wedding cake has been enjoyed. They are fitting gifts for a romantic, country-inspired spring wedding, and along with an array of candles, these crafts for spring can also be used as part of the table decor.
Estimated Cost$21-$30
Time to CompleteWeekend project
Primary TechniqueMixed Media

SeasonSpring
Materials List
- Small galvanized tin basket
- Light pink glitter 10mm mini tiles, enough to glue to the basket's handle
- Suitable pink floral napkin
- White grout
- Soil, succulent, and small white pebbles
- Acrylic paint in the following color: mother of pearl rose
- Bostik Clear All-Purpose Adhesive Glue
- Mod Podge
- Hard as Nails water-based varnish
- Paintbrush
- Standard scissors
- Small piece of cloth, cut from old soft cloth
- Few sheets of old newspapers to protect the working area
- Small plastic container and a spoon
- Optional: safety glasses and double-wheel mosaic tile cutter
Instructions
-
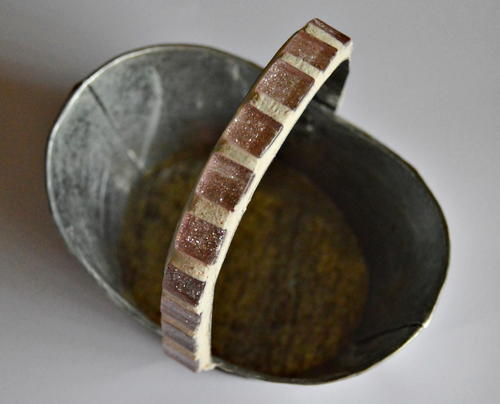
Glue the tiles one at a time to the basket's handle. Depending on the size of the basket used, you might need to cut the tiles at the end in half to have a perfect fit.
-
Allow the glue to dry thoroughly overnight before proceeding with the next step. When the glue is completely dry, you will not be able to move the tiles anymore.
-
Now it is time to grout. Add a few heaped spoonfuls of grout to the plastic container and then add a few drops of cold water until the grout is the right consistency - the grout should not be runny.
-
Use your finger to spread the grout in between the tiles and up to the edge of the basket's handle, gently pressing the grout in between all the tiles, carefully ensuring not to leave any air pockets below the grout. Only use a little bit of grout at a time.
-
Wet the small piece of cloth. Gently wipe away the grout from the tiles and smooth over the surface of the grout. If necessary, rinse the piece of cloth and keep wiping until the tiles are clean and the grout smooth.
-
Allow the basket to dry overnight again.
-
Paint the bottom and inside of the try with a thin layer of mother of pearl rose paint and allow to dry.
-
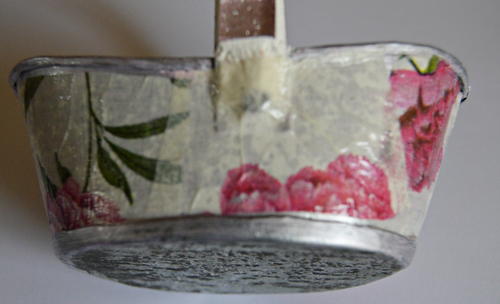
Cut strips from the floral napkin and measure to see that these would fit all around the basket below the basket's trim. Remove the bottom layters from all the napkin strips. Put the first strip of napkin in position on the basket and paint Mod Podge over the strip of napkin. It is best to start painting from the middle of the strip towards the sides, working in small triangles. Be careful not to tear the napkin. Use your index finger to gently rub out any air bubbles from the back of the strip. Do the same with the other strips so that the sides are covered. Allow the basket to dry thoroughly for about two hours.
-
Paint a layer of Mod Podge over the side of the basket. Allow to dry and repeat twice again, but remember that with every layer, the direction in which the Mod Podge is applied must be changed from horizontal to vertical to horizontal, etc.
-
To protect the basket from wear and tear, apply one coat of the water-based varnish to the side, as well as the inside and bottom of the handle.
-
Fill the pot with potting soil and plant the succulent. Add small decorative pebbles to the pot once the plant has been added.
Read NextMermaid Shell Topped Bottles

