This project was submitted by one of our readers, just like you.
Papercraft Octopus
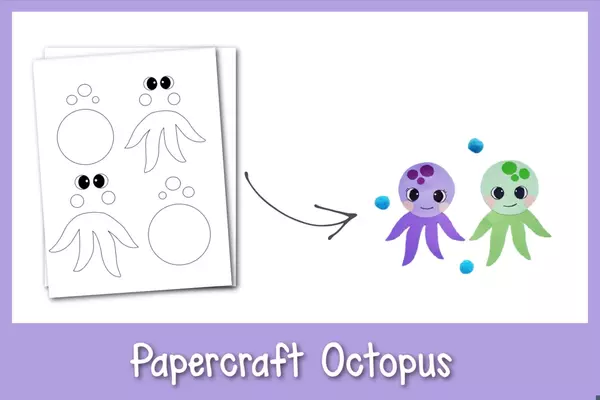
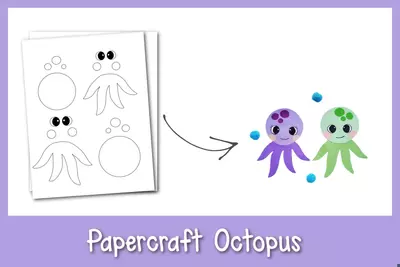
"Enjoy some creativity in your day with this simple Papercraft Octopus! In just four simple steps, your kids will have a completed project that is sure to give them a great feeling of accomplishment! When my kids had a blast spending time creating this Papercraft Jellyfish, I knew I had to keep my eye out for another sea creature craft. That’s why I was so excited when I came across this Papercraft Octopus! I knew that my kids would love this simple craft. Another reason I love making these crafts is that it gives us the opportunity to start conversations and learn together. I’m sure your kids, like mine, have sooo many questions about all sorts of things. While we craft, we can discuss some of their questions and connect with one another. So after school, we gathered our supplies that we had around the house and got to work! "
Primary TechniquePaper Crafts

Materials List
- Construction paper
- Craft glue
- Sharpie
- Pencil
- Scissors
Instructions
-
To start this craft, choose the colors of construction paper you’d like to use. For this tutorial, I used three different shades of purple for each part of the papercraft octopus. The template includes a head base, head spots, tentacles, blush (small round shapes) and eyes. You can cut the eyes from the template. Trace the rest of the patterns onto your desired colors of paper. Once they’re all traced, cut each of the pieces out.
-
Now it’s time to start gluing the pieces together. Start by gluing the head spot cutouts in a cluster near the top side of the head base cutout (the big round cutout).
-
Next, glue the eyes and the blush cutouts on the head cutout as well. I attached the eyes around the middle of the head and the blush cutouts along the bottom side of the head.
-
Finally, glue the head pattern on the curved side of the tentacles cutout. Use a sharpie or a gel pen to draw the mouth of the papercraft octopus.
Read NextRice Cake Owl Snacks


