This project was submitted by one of our readers, just like you.
Paper Bag Baby Yoda Puppet
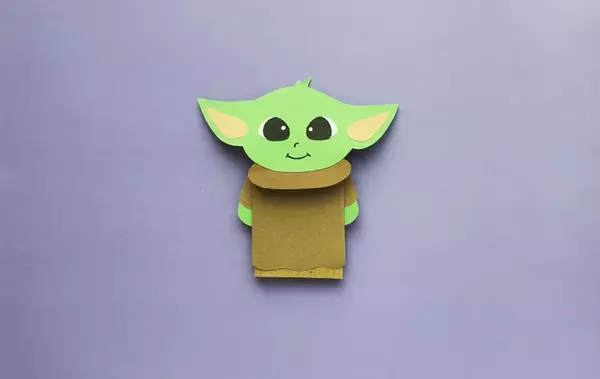
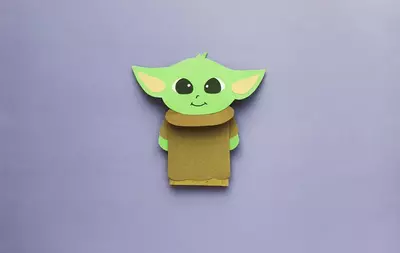
"This Paper Bag Baby Yoda Puppet is the perfect activity for this summer! Star Wars is all the rage and your kids will love making a puppet that they can add to their pretend play as they catch up on their favorite shows that have Yoda in them. All you need is a paper bag, construction paper, a pencil, a pen, craft glue and scissors and you will be ready to make this fun craft with your kids."
Primary TechniquePaper Crafts

Materials List
- Construction paper
- Paper bag
- Pencil
- Scissors
- Sharpie
- Craft glue
Instructions
-
Select brown, green and pink colored craft papers for the baby Yoda paper bag puppet. Trace and cut out the head and hand patterns on the green paper, trace the inner ear parts on pink paper, trace the sleeve and collar patterns on brown paper and cut out the eyes directly from the template.
-
Attach the inner ear cutouts on the ear parts of the head pattern.
-
Attach the eye cutouts on the head. Use a sharpie to draw the nose and mouth-line of the baby Yoda papercraft pattern.
-
Attach the collar cutout along the bottom side of the head pattern.
-
Select your paper bag and cut out a piece from the brown paper to cover a side of the paper bag.
-
Attach the prepared paper on either side of the paper bag, which will be the front side of the paper bag puppet. Attach the hand cutouts with the sleeve cutouts.
-
Attach the arm patterns on both sides (left and right) of the paper bag.
-
Attach the head pattern on the bottom side of the paper bag and then flatten the head with the front side of the paper bag puppet figure.
Read Next60s Inspired Step Stool


