How to Carve a Pumpkin for Halloween
Carving a pumpkin is a great way to decorate your home for Halloween. Going to the pumpkin patch and carving up a few Jack O' Lanterns is a holiday tradition for most families, but sometimes our pumpkins are less than masterpieces. Perfect your carving technique with our simple, handy guide to create a Halloween pumpkin you're unlikely to forget. There's no simpler way to learn how to carve a pumpkin for Halloween!
In order to carve a pumpkin, first grab the essentials:
- Pumpkin
- Black marker
- Large, carving knife
- Large spoon for scooping
- Bowl or plastic bag to collect the seeds and pulp
- Tea light candle
Instructions:
- Use your marker to draw a circle around the stem on top of the pumpkin. This will guide you while you cut out the lid. Using your knife, cut along the line to create your lid.
- Once the top of the pumpkin is off, use your hands or spoon to scrape out all the seeds and loosen the pulp until the pumpkin is cleaned out.
Note: Your pumpkin should be smooth on the inside before you begin carving.
- Use your marker to draw a Jack O’ Lantern face on the pumpkin. You can practice on scrap paper first, until you have the face right.
- Use your carving knife to cut out the shapes that make your Jack O’ Lantern face.
- Pop in your candle, light it, and close up your pumpkin.
There are many different ways to carve a pumpkin, you can use the traditional method listed above, or experiment with modern pumpkin carving patterns like the ones below!
-
Must Make Illustrated Carved Pumpkins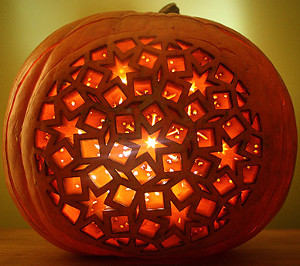
- Gem-o'-Lanterns
- The New Classic Jack-o'-Lantern
- Magical Laser Cut Jack-o'-Lantern
- Make Your Own Pumpkin Family
- Starry Night Drilled Pumpkins
- Custom Monogrammed Pumpkin
- DIY Halloween Pumpkin House
- Last Minute Mini Jack-o'-Lanterns


