Twisty Clay Candy Cane Ornament
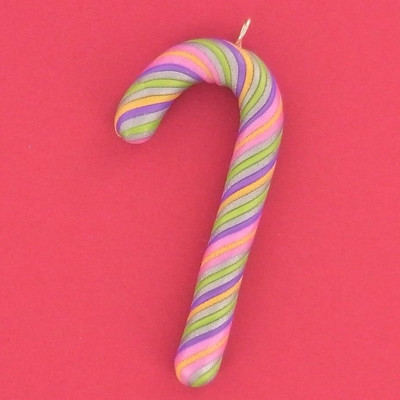
The Twisty Clay Candy Cane Ornament is a great tutorial for DIY Christmas ornaments. Twist your clay to make a beautiful multicolored candy cane to hang on your tree. This candy cane craft is awesome because you can customize your colors to your Christmas tree decor. If you are looking for the perfect ornaments to hang in the gaps on your tree, this quick craft will let you pick the colors that will look best there. So grab your clay and make these awesome and easy clay ornaments this holiday season.

Materials:
- Premo! Accents®, 2 oz , Silver - 1 block of clay
- Premo! Accents®, 2 oz , Purple Pearl - 1 block of clay
- Premo! Accents®, 2 oz , 18K Gold - 1 block of clay
- Premo! Accents®, 2 oz , Magenta Pearl - 1 block of clay
- Premo! Accents®, Kit, Bright Green - 1 block of clay
- Sculpey® Clay Extruder
- Sculpey Etch ‘N Pearl
- Craft wire
Instructions:
- Preheat oven to 275 °F. Test the temperature with an oven thermometer for perfectly cured clay. Condition all the clay by kneading it until it’s soft and smooth, or by running it through the Clay Conditioning Machine for several passes on the widest setting. Fold the clay in half after each pass and insert the fold side into the rollers first.
- Make a silver log 3/8" diameter x 5" long.

- With the Sculpey Clay Extruder and a 1/8" circle die, extrude strings of Purple Pearl, Silver, 18K Gold, Magenta Pearl, and Bright Green Pearl.

- Lay strings lengthwise on the log. When the log is covered, roll it on your work surface to adhere strings and twist stripes.

- Trim the ends so the log is 5" long, and fold in the ends.
- Curve the log into a candy-cane shape.
- Use the Etch 'N Pearl tool to make a hole at the top of the candy cane.
- Twist the wire loop around the wide end of the biggest Etch 'N Pearl tool.
- Insert the twisted end of the wire into the hole. Bake 30 minutes.
Read NextShiny Recycled Light Bulb Ornament

