This project was submitted by one of our readers, just like you.
Elf On The Shelf Paper Bag Puppet
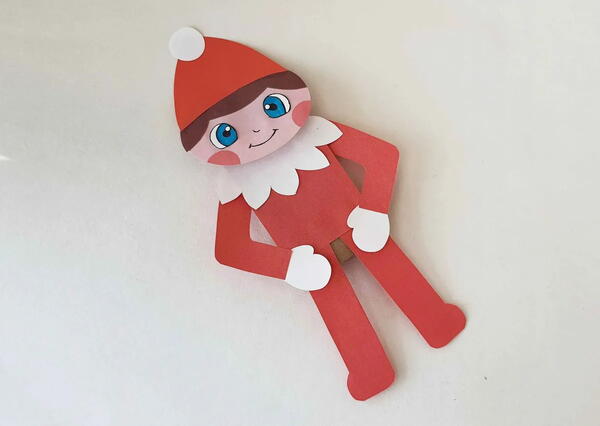
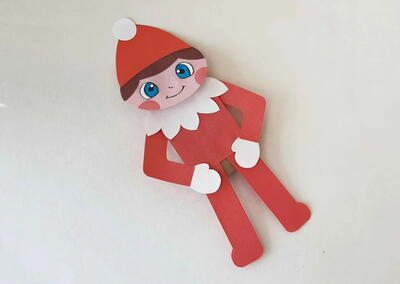
"Are your kids excited for their elf to come back this year? kids love the Elf on the Shelf and want to touch and play with him, but as we all know, if he is touched he will use his magic. Help keep the magic alive and your kids happy by making this cute Elf on the Shelf Paper Bag Puppet that they can play with to their heart's content. Paper Bag Puppets are some of my favorite crafts. A stack of paper bags is very inexpensive and then you have what you need for so many puppets! I love seeing all the stories my kids invent. "
Primary TechniquePaper Crafts

Materials List
-
Colored construction paper
-
Pencil – to trace the template
-
Scissors
-
Craft glue
-
Sharpie or gel pen
-
Paper bag
Instructions
-
Select red, white, black or brown, and pink construction paper. Trace the template patterns on the selected paper and cut out the traced patterns. The template includes the head, hair, hat, hat pompom, gloves, sleeves, trousers, and collar.
-
Glue the hands to the ends of the sleeves and glue the small white circle to the top of the hat.
-
Glue the hair to the top of the head.
-
Cut two small round shapes from pink paper (blush) and draw and cut out a pair of eyes from white paper
-
Cut two small round shapes from pink paper (blush) and draw and cut out a pair of eyes from white paper
-
Glue the hat onto the head.
-
Select a paper bag or craft one out of paper. Measure and cut a red rectangle that is large enough to cover one flat side of the bag.
-
Glue the collar onto the red rectangle, about 1 inch below the top edge. This will be your elf’s shirt.
-
Glue the trouser legs onto the bottom of the shirt.
-
Glue the body to the paper bag, underneath the flap
-
Flatten the bottom of the bag and glue the head onto it.
-
Glue the arms to the sides of the elf to complete the puppet.
Read NextWhite Fuzzy Wreath with Snowflakes


