This project was submitted by one of our readers, just like you.
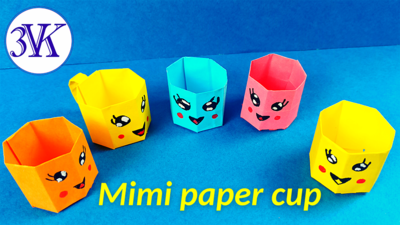
How To Make Mini Paper Cup?
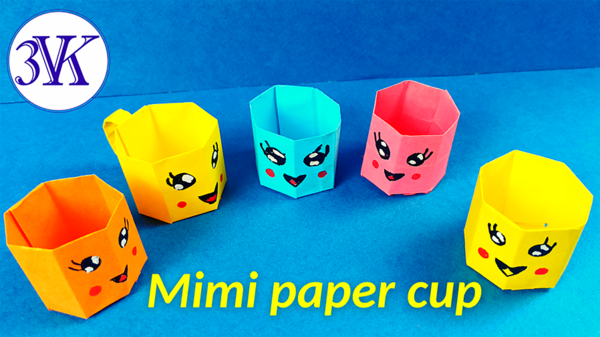
"A mini paper cup this is a good option for a birthday gift for mom or dad, which the child will make with his own hands. Same mini paper cup is a good option for joint creativity for children and parents. In children, the process of making a mini paper cup develops creativity, artistic taste, and fine motor skills. And the production time will take no more than 30 minutes. Watch a video on how to make mini paper cup. "
Primary TechniquePaper Crafts

Materials List
- A sheet of colored paper;
- Felt-tip pen;
- Scissors;
- Glue stick.
Instructions
-
Cut a 15cm by 15cm square out of colored paper.
-
Fold the sheet in half back (away from yourself) so that one part is flat against the other.
-
Flatten the sheet. As a result, a fold line should remain. Fold the bottom side to the fold line.
-
Fold the top side to the fold line
-
Fold the right side to the left to form a square. This should leave a center fold line. Turn the square with the fold line towards you.
-
Bend the square towards you. Fold the bottom of the rectangle to the center fold and flatten, fold the top of the rectangle to the center fold and flatten. As a result, there should be 2 more fold lines.
-
Fold the bottom of the rectangle towards the top fold line and flatten. Fold the top side of the rectangle towards the bottom fold line and flatten. After that, 5 fold lines were obtained. Bend the bottom side of the rectangle again to the bottom fold line, and the top side of the rectangle to the top fold line and flatten. As a result, 7 fold lines should remain. Peel back the right side of the rectangle and cut it.
-
Rotate the resulting rectangle horizontally away from you.
-
Make cuts along the 7 bottom vertical folds (up to the horizontal fold line).
-
Cut off the last detail.
-
Turn the model over. Draw the eyes.
-
Draw the mouth and cheeks.
-
Apply glue to the far right side of the craft.
-
Glue the extreme edges together.
-
To make the bottom of the mini paper cup , fold and glue the protruding ponytails.
-
It turned out the bottom of the mini paper cup.
-
Cut out a 5 cm by 3 cm rectangle from the remains of colored paper - this will be a pen.
-
Bend it in half along the long side and glue it.
-
Bend the resulting rectangle in half again and glue it again.
-
Bend one edge of the handle.
-
Bend the second edge of the handle.
-
Apply glue to these parts and glue to the mini paper cup.
-
The mini paper cup is ready !!!
NotesPlease don't forget to subscribe to our YouTube channel 3 VK YT.
Read NextSeussical Mixed-Up Animals Activity


