Surprise Gift Box for Mom
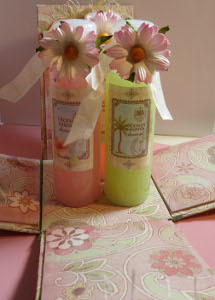
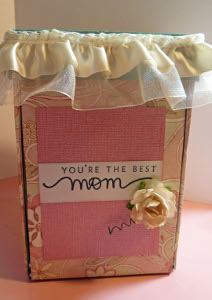
Don't just wrap your special Mothers Day gifts in ordinary wrapping paper. Make a beautiful decorative box to present her with instead! This Surprise Gift Box for Mom is almost like a gift in itself that she can display on a bookshelf or dresser. Learn how to make decorative boxes using chip board, scrapbook paper and some pretty accent pieces with this step-by-step tutorial from craft designer Carlene Eshelman.

Materials:
- Four 4” ribbon pieces, 1” wide or larger
- Four 8”x 6” scrapbook paper pieces
- Four 3”x 3” scrapbook paper pieces
- Four 3 ¾” x 5” scrapbook paper pieces
- Four 3 ¾” x 6” scrapbook paper pieces
- Four 3 ¾” x 6” chipboard
- Two 3 3/4” squares of chipboard
- Liquid glue
- One 12” x 12” green cardstock
- Hot glue
- 2 paper flowers
- 16” lace trim
- Bone folder
- Scoreboard
- Mother’s day stamp
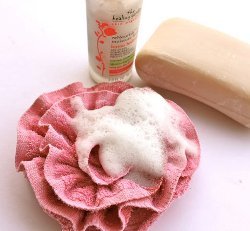
- 3 shower gels
- 4 shipping tags #6
- 4 shipping tag envelopes
- Pink glimmer mist by tattered angels
- 24” of two kinds of yarn fibers
- ¼” terrifically tacky tape
Instructions:
1. Cover rectangle chipboard pieces with 8”x6” paper. Use bone folder to help create crisp edges.
2. Cover one square chipboard with extra scratch paper.
3. Lay chipboard piece wrong side up.
4. Lay terrifically tacky tape on each edge of square.
5. Place terricially tacky tape on one short edge of your rectandle pieces from step 1. (place tape on wrong side)
6. Adhere one 4” ribbon to each side of rectangle and square.
7. You should now have a “t” shape foundation.
8. Cover unfinished side of rectangle chipboard with 3 ¾” x 6” paper pieces. You should now have both sides covered with paper.
9. Score 1 ½” of bottom of all four tag envelopes.
10. Fold on score and glue flap to back of envelopes.
11. Glue 3 ¾” x 5” papers to front of envelopes.
12. Glue envelopes to inside flaps of box.
13. Cut 1” off bottom of all four tags.
14. Spray with glimmer mist. Let dry.
15. Tie yarn fibers into tag holes.
16. Write special messages for your mom onto the tags, and place tags into tag envelopes in box.
17. Decorate outside of box by stamping mother’s day sentiment twice onto scrap cardstock.
18. Glue 3” x 4” cardstock pieces to front of two sides of the box.
19. Cut sentiments out and glue on top of cardstock fronts.
20. Hot glue two flowers to front of box as desired.
21. To make box top, cut green cardstock into 8” x 8” square.
22. Score all sides of square at 6”, and 7” marks on scoreboard.
23. Fold at score lines.
24. Cut 2” into green cardstock using scorelines as guide. Do this for all sides.
25. Cut top 3 squares of green cardstock off of each side.
26. Fold and glue each side of box top. Each piece will connect with a square tab.
27. Place shower gels into center of box, and cover.
Videos:
Read NextVintage Hankies Quilt
Your Recently Viewed Projects
Marilyn B
Mar 17, 2017
This is a gorgeous gift box and would be proudly displayed long after the contents are gone! A great place to store greeting cards, pens, buttons, kid's art or letters! Scrapbook paper works great, but I have also used nice wall paper remnants and some satin ribbon as accents! Thank you for this great idea and super instructions!
Report Inappropriate Comment
Are you sure you would like to report this comment? It will be flagged for our moderators to take action.
Thank you for taking the time to improve the content on our site.

