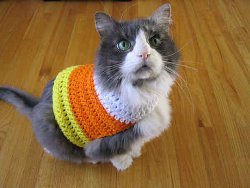
Candy Corn Hat and Booties
For Halloween this year, make your baby the adorable Candy Corn Hat and Booties. The crochet hat pattern teaches you how to make the cutest hat to keep your baby's head warm. To match the hat is a baby booties crochet pattern. Follow the easy tutorial and you'll have a matching homemade hat and booties set for your baby. This craft is so cute, you'll just want to eat your baby up. Warning, you will receive lots of compliments on your beautiful crochet skills.

Materials:
- Vanna's Choice Yarn: Mustard ball
- Vanna's Choice Yarn: Terracotta ball
- Vanna's Choice Yarn: White ball
- Lion Brand Knitting Needles- Size 8 [5 mm]
- Lion Brand Double-Pointed Needles - Size 9
- Lion Brand Split Ring Stitch Markers
- Lion Brand Large-Eye Blunt Needles (Set of 6)
Gauge:
16 sts = about 4 in. (10 cm) with larger needles in St st worked in the rnd (k every rnd).
When you match the gauge in a pattern, your project will be the size specified in the pattern and the materials specified in the pattern will be sufficient. The needle or hook size called for in the pattern is based on what the designer used, but it is not unusual for gauge to vary from person to person. If it takes you fewer stitches and rows to make your swatch, try using a smaller size hook or needles; if more stitches and rows, try a larger size hook or needles.
Making a Gauge Swatch:
Stitch Explanation:
M1 (make 1) An increase worked by lifting the horizontal thread lying between needles and placing it onto left needle. Knit this new stitch through the back loop - 1 st increased.
Pattern Stitch:
K2, p2 Rib worked in the rnd (multiple of 4 sts)
Row 1: *K2, p2; rep from * to end of rnd.
Rep Row 1 for K2, p2 Rib worked in the rnd.
Notes:
1. Hat is worked in the round on double pointed needles.
2. When knitting in the round on double pointed needles (dpns), your sts need to be divided fairly evenly onto the needles. If you are working with a set of 5 dpn, your sts should be divided among 4 needles. The total number of sts will not always be evenly divisible by the number of dpns that you are using - this is not a problem! Simply divide your sts as evenly as possible, you will still create a symmetrical 'tube' of knitting.
3. Booties are worked in rows on straight needles. The cast-on edge, when folded in half, forms the center of the sole of the Bootie.
Instructions:
Hat
- With double pointed needles and A, cast on 60 sts. Divide sts onto 4 needles - 15 sts on each needle. Place marker for beg of rnd. Join by working the first st on the left hand needle with the working yarn from the right hand needle and being careful not to twist sts.
- Rnds 1-5: Work in K2, p2 Rib worked in the rnd.
- Rnds 6-14: Work in St st worked in the round (k every rnd). Change to B.
- Rnd 15: With B, knit.
- Rnd 16: *K to last 2 sts on needle, k2tog; rep from * around - 56 sts at the end of this rnd.
- Rep Rnds 15 and 16 until 32 sts rem. Change to C.
- With C, rep Rnds 15 and 16 until 4 sts rem. Cut yarn, leaving a long yarn tail. Thread yarn tail through rem sts and pull to gather. Knot securely.
Finishing
- Weave in ends
Booties (make 2)
With smaller needles and A, cast on 23 sts.
- Row 1: P11, place maker (pm), p1, pm, p to end.
- Row 2: K1, M1, k to last st before marker, M1, k1, M1, slip marker (sm), k1, sm, M1, k1, M1, knit to last st, M1, k1 - 29 sts at the end of this row.
- Rows 3, 5 and 7: Purl.
- Row 4: Rep Row 2, removing markers as you go - 35 sts.
- Row 6: Knit.
- Row 8: Change to B.
- With B, k14, k2tog, pm, k3, pm, k2tog, k14 - 33 sts.
- Row 9: P to 2 sts before marker, p2tog, sm, p to next marker, sm, p2tog, p to end - 31 sts.
- Row 10: K to 2 sts before marker, k2tog, sm, k to next marker, sm, k2tog, k to end - 29 sts.
- Rows 11 and 12: Rep Rows 9 and 10 - 25 sts at the end of Rows 12.
- Row 12: Rep Row 9 - 23 sts. Change to C.
- Row 13: Knit.
- Row 14: Purl.
- Rows 15-16: Rep Rows 13 and 14.
- Bind off loosely. Cut yarn, leaving a long yarn tail.
Finishing
- Thread yarn tail into blunt needle and seam sides. With same yarn tail, continue to seam across open end to close toe.
- Weave in ends.
Read NextDIY Shawl Witchy Crochet Pattern

